How to Papercraft Papercrafter Techniques Projects
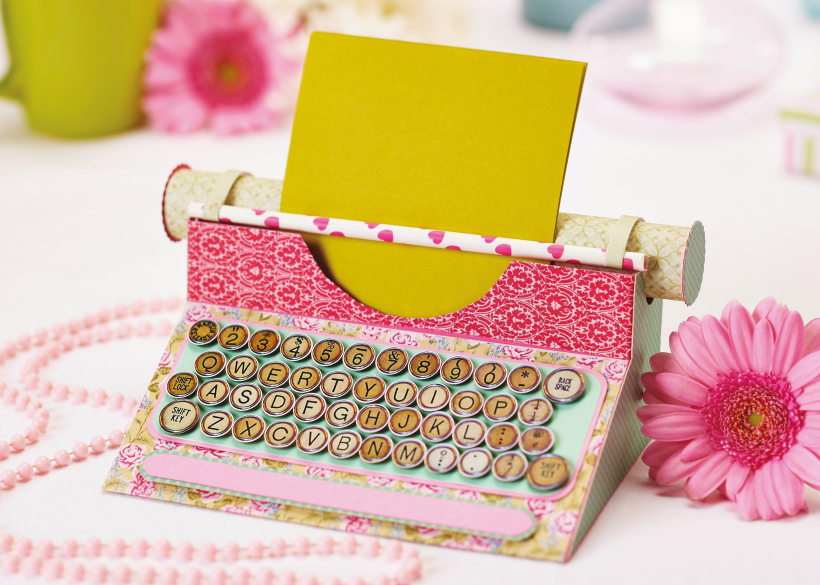
Keep your notes safe in this stylish mini typewriter

Please login to download. Sign in here
Busy lives often involve a lot of memos and reminders, and it can sometimes be hard to keep track. Luckily, we’ve got a sophisticated solution to keep your desk tidy and your work organised. This paper typewriter by Corinne Bradd is easy to make using our free template and presents an original way to keep all your notes in one place. Use your favourite papers and brighten up your workspace too.
Craft essentials
Online template from papercraftermagazine.co.uk
Typewriter key motifs: two sets
Circle punch: small
Paper straw
Washi tape
1. Stamp or print out a set of typewriter keys and stick to card. Cut out each one with a same-sized circle punch. Cover a second set with pale washi tape so the design is still visible.
2. Trim the taped set into a rectangle, round off the corners and mount onto card, leaving a narrow border all around. Use foam pads to attach the cut-out letters to the panel on top of their corresponding keys.
3. Download the typewriter body template from the website, then cut out and fold. Glue the side pieces to the tabs on the main body and cover the panels with a selection of patterned papers. Stick the keys panel to the top centre of the body’s sloping section.
4. Cut a 1cm x 14.5cm strip of coloured card. Round the ends and mount onto patterned paper, trimming to leave a border. Fix this below the keys panel with foam pads to create a space bar.
5. Cut a 15cm x 20cm piece of thin card and roll lengthways into a cylinder with a 2.5cm diameter. Cover with patterned paper and glue small scallop-edged card circles to each end. Rest this in the dips in the top of the typewriter to create the carriage roller.
6. Create two 0.5cm x 10cm strips of paper. Glue 2cm of each piece around each end of a drinking straw and lightly curl the remainder of the strip. Rest the straw in front of the roller and glue the ends of the paper strips to the back of the model.

YOU WILL NEED:
Old books
Die, circle
Wooden skewer
Binder clips
Alcohol marker, orange
Adhesives: PVA glue, glue stick
Die-cutting machine

METHOD:
1. Use a circle die to cut lots of discs from book pages. Fold each circle in…
Halloween crafts Home decor Home decorations How to Papercraft Papercrafter Revamping Techniques Projects

Whilst this may look like a paper cutting that took hours to create, it really couldn’t be any easier. Our talented designer Corinne Bradd has created 15 templates for you to…
Die cutting Home decor Home decorations How to Papercraft Papercrafter Projects

You Will Need:
Templates or SVG files
Brother ScanNCut SDX1200 (optional)
Strong card
Cardstock, various colours
Jute yarn
PVA glue
Autumnal Display
1. Draw a 25cm wide circle on strong card, then draw a concentric 17cm wide circle…
Home decor Home decorations Papercraft Papercrafter Techniques

Shadow box cards, otherwise known as tunnel greetings or diorama cards, are designed to transport the recipient to picture-perfect backdrops in an instant. In this case, PaperCrafter designer Francesca Vignoli…
Birthday crafting Card making Die cutting How to Stamping Techniques Card Making
NO SPAM
Just pure crafty goodness!
YOU CAN REGISTER WITH US TODAY OR CHECK OUT THE MEMBER BENEFITS YOU CAN GET YOUR HANDS ON

Not only will you receive our amazing newsletters packed with the latest projects, exclusive giveaways and freebies, you’ll also get your hands on all of this...
View the benefits
All of our offers will be delivered straight to your inbox - they’re only a click away!
Show me the next benefit...
Get access to loads of free printables and downloads at your fingertips.
Show me the next benefit...NO SPAM
Just pure crafty goodness!
NO SPAM
Just pure crafty goodness!


