Card making Die cutting How to Stamping Techniques Card Making
Embrace a new stamping technique with Keren Baker’s trio of new baby cards

Stamping Stars
One of our favourite ways to craft is stamping, and one of our favourite things about stamping is just how many techniques there are to try. The method we’ve employed here, spotlight stamping, is great for many reasons. For one, it’s relatively simple, while the effect looks anything but. By raising certain areas of the stamped image, you’re given an added sense of dimension that is incredibly hard to replicate. This technique really lends itself to experimentation, so try it with different dies, motifs and stamps.
Under Pressure
When stamping the images onto your card fronts, it’s slightly different as you’ll be basically working with two levels. This is why applying more pressure than you would normally is important – it ensures you’ll have a clean, even finish once everything is stuck down. You’ll want some nice, thin cardstock for the background panel and letters themselves, as this will make the whole process easier to pull off.
You Will Need:
Dies, Altenew Caps Bold Alphabet
Stamps: Clearly Besotted Balloon Bunch Buddies, Under My Umbrella, To The Moon & Back
Ink pads: Tsukineko Memento Tuxedo Black; Ranger Distress Tumbled Glass, Evergreen Bough, Squeezed Lemonade, Spun Sugar, Fossilized Amber
Stencil, Clearly Besotted Cloudy Days
Alcohol markers
Gel pen, white
Cardstock, various colours
Adhesives: glue, 3D foam pads
Die-cutting machine
SKY HIGH
1. Create a white 15cm x 16.5cm blank, then matt with yellow. Trim a panel of white slightly smaller. Die cut the individual letters for the sentiment from white, then position the letters onto the panel, keeping them in place with low-tack tape.
2. Stamp the motifs over the letters and onto the background, applying a lot of pressure. Colour in the images with alcohol markers, then adhere onto the blank. Create the clouds by applying yellow and blue distress inks through a cloud stencil.
3. Remove the low-tack tape and fix 3D foam pads to the reverse of each letter. Adhere them in their original places. Stamp two clouds onto white card, colour in, then cut out. Secure to the greeting. Add white and black dots to the moon to complete.

CLOUD NINE
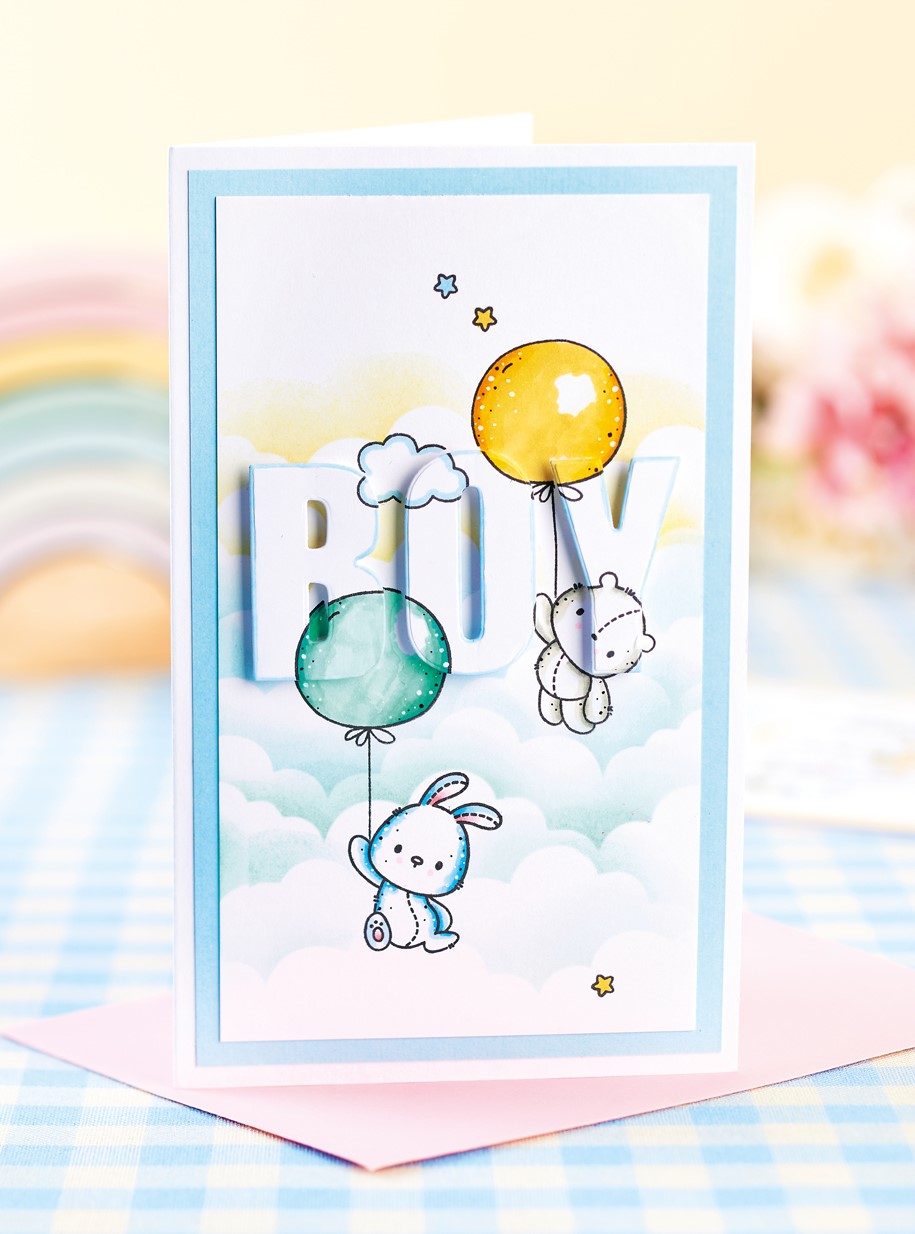
1. Create a white blank, 11cm x 18cm, and layer blue card on top. Trim a white panel slightly smaller. Die cut individual letters to spell out ‘Boy’ from white, then position onto the panel, keeping them in place with low-tack tape.
2. Stamp bears, balloons and stars onto the panel in black ink, applying more pressure than usual in order to create uniformity across the letters and background. Colour in the motifs with alcohol markers. Stamp the images again onto sticky note paper, trim, then cover the motifs to ensure protection from the stencil ink.
3. Apply blue and green distress inks through a stencil in a circular motion. Add 3D foam pads to the reverse of the letters, then adhere them in place. Stamp and colour in multiple stars, then draw some black and white dots to finish.

PRETTY IN PINK
1. Make a white 12.5cm x 17cm blank. Matt with pink paper. Trim white card slightly smaller. Follow the step-by-step opposite to build up the panel.
2. Stamp three clouds onto white card, colour in, then cut out. Adhere to the greeting with 3D foam pads. Add black and white dots to various parts of the motifs to complete.

YOU WILL NEED:
Old books
Die, circle
Wooden skewer
Binder clips
Alcohol marker, orange
Adhesives: PVA glue, glue stick
Die-cutting machine

METHOD:
1. Use a circle die to cut lots of discs from book pages. Fold each circle in…
Halloween crafts Home decor Home decorations How to Papercraft Papercrafter Revamping Techniques Projects

Whilst this may look like a paper cutting that took hours to create, it really couldn’t be any easier. Our talented designer Corinne Bradd has created 15 templates for you to…
Die cutting Home decor Home decorations How to Papercraft Papercrafter Projects

You Will Need:
Templates or SVG files
Brother ScanNCut SDX1200 (optional)
Strong card
Cardstock, various colours
Jute yarn
PVA glue
Autumnal Display
1. Draw a 25cm wide circle on strong card, then draw a concentric 17cm wide circle…
Home decor Home decorations Papercraft Papercrafter Techniques

Shadow box cards, otherwise known as tunnel greetings or diorama cards, are designed to transport the recipient to picture-perfect backdrops in an instant. In this case, PaperCrafter designer Francesca Vignoli…
Birthday crafting Card making Die cutting How to Stamping Techniques Card Making
NO SPAM
Just pure crafty goodness!
YOU CAN REGISTER WITH US TODAY OR CHECK OUT THE MEMBER BENEFITS YOU CAN GET YOUR HANDS ON

Not only will you receive our amazing newsletters packed with the latest projects, exclusive giveaways and freebies, you’ll also get your hands on all of this...
View the benefits
All of our offers will be delivered straight to your inbox - they’re only a click away!
Show me the next benefit...
Get access to loads of free printables and downloads at your fingertips.
Show me the next benefit...NO SPAM
Just pure crafty goodness!
NO SPAM
Just pure crafty goodness!


