Die cutting How to Papercraft Papercrafter Die cutting
Watch how Signature Dies and a refined style can transform your makes!

YOU WILL NEED:
Craft essentials
Dies: Signature Orchid Trio, Mini Ivy Flourishes; nesting ovals, nesting squares
Embossing folder, swirl
Pens, marker
Ink pad, Tim Holtz Distress Oxide Brushed Corduroy
Buttons
Pre-printed sentiments

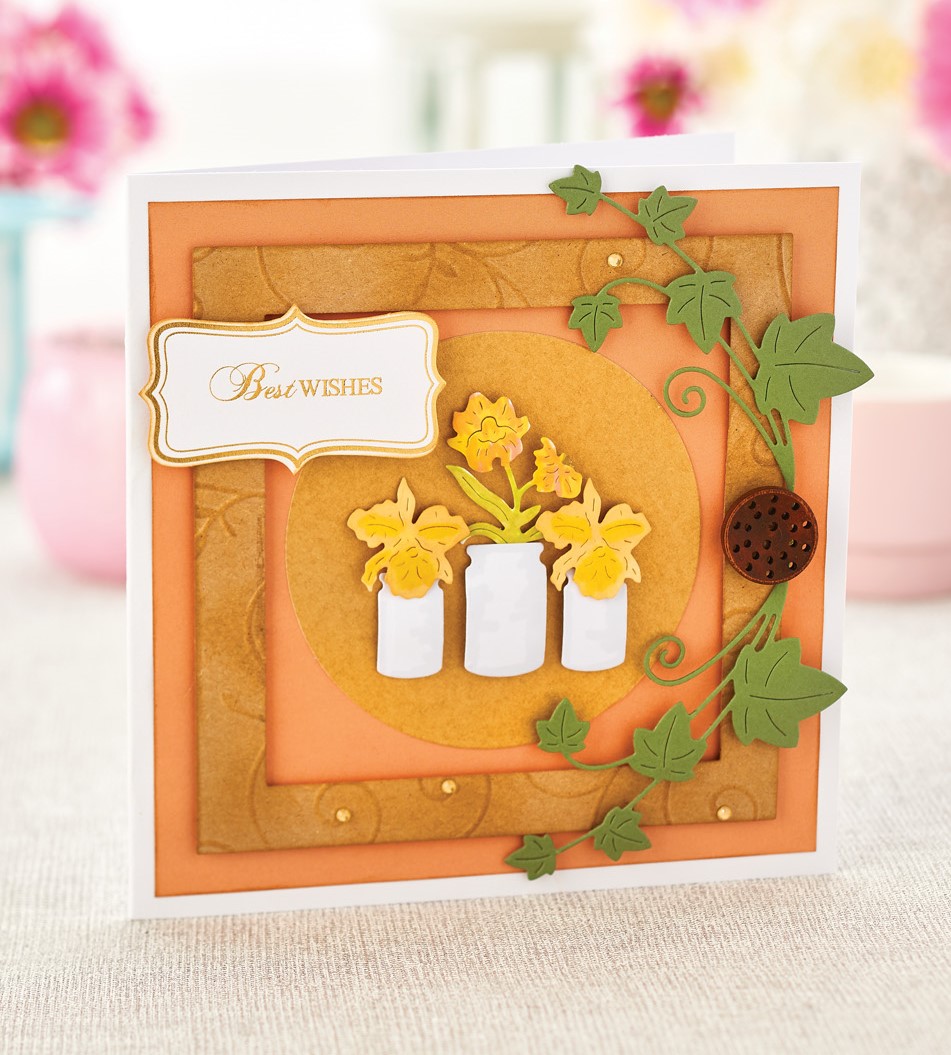
TRIPLE ORCHID
1 Cut a 14cm square from orange card. Blend the edges with Brushed Corduroy distress ink. Matt onto a side-folding white blank.
2 Create a 12cm square frame from kraft card with an inner diameter of 9.5cm. Emboss with a swirl folder. Fix the frame onto the card front with 3D foam pads.
3 Cut an 8.5cm circle from gold card and secure inside the frame. Die cut an ivy embellishment and attach to the right-hand side. Glue a button to the centre of the die-cut ivy.
4 Die cut three orchid shapes in white card and colour using marker pens. Fix the vases and flowers onto the centre of the card. Add a sentiment and gems to finish.

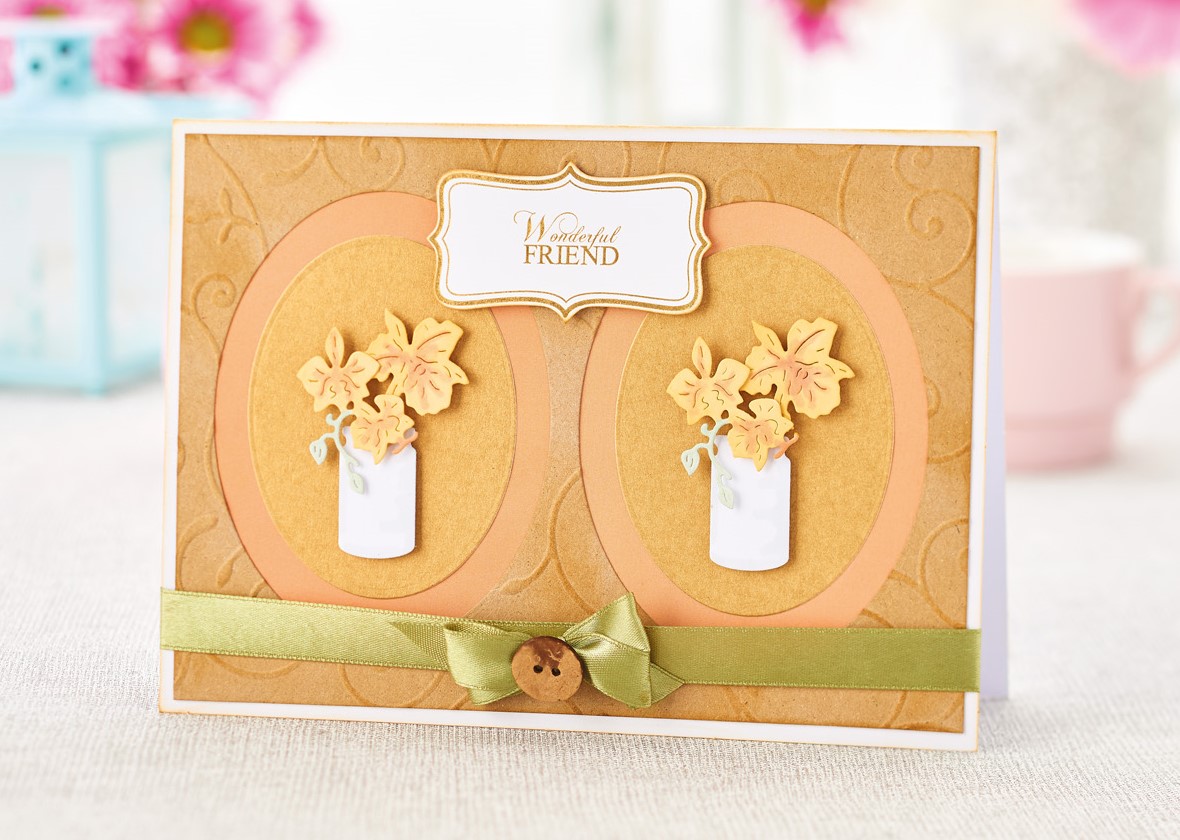
FAB FRAMING
1 Cut kraft card to 12cm x 17cm. Snip two oval apertures through it. Emboss with the embossing folder and blend with Brushed Corduroy distress ink. Fix orange card behind the ovals, then mount the panel onto a top-folding blank.
2 Cut two smaller ovals from gold card and secure in the middle of each aperture.
Die cut two orchid shapes from white card and colour using marker pens. Fix vases and flowers to the centre of the oval.
3 Wrap ribbon around the bottom of the card and fix the ends inside. Attach a ribbon and bow embellishment in the centre. Add the sentiment at the top of the card front.
Head over to joannasheen.com to browse a stunning selection of crafty goodies.

YOU WILL NEED:
Old books
Die, circle
Wooden skewer
Binder clips
Alcohol marker, orange
Adhesives: PVA glue, glue stick
Die-cutting machine

METHOD:
1. Use a circle die to cut lots of discs from book pages. Fold each circle in…
Halloween crafts Home decor Home decorations How to Papercraft Papercrafter Revamping Techniques Projects

Whilst this may look like a paper cutting that took hours to create, it really couldn’t be any easier. Our talented designer Corinne Bradd has created 15 templates for you to…
Die cutting Home decor Home decorations How to Papercraft Papercrafter Projects

You Will Need:
Templates or SVG files
Brother ScanNCut SDX1200 (optional)
Strong card
Cardstock, various colours
Jute yarn
PVA glue
Autumnal Display
1. Draw a 25cm wide circle on strong card, then draw a concentric 17cm wide circle…
Home decor Home decorations Papercraft Papercrafter Techniques

Shadow box cards, otherwise known as tunnel greetings or diorama cards, are designed to transport the recipient to picture-perfect backdrops in an instant. In this case, PaperCrafter designer Francesca Vignoli…
Birthday crafting Card making Die cutting How to Stamping Techniques Card Making
NO SPAM
Just pure crafty goodness!
YOU CAN REGISTER WITH US TODAY OR CHECK OUT THE MEMBER BENEFITS YOU CAN GET YOUR HANDS ON

Not only will you receive our amazing newsletters packed with the latest projects, exclusive giveaways and freebies, you’ll also get your hands on all of this...
View the benefits
All of our offers will be delivered straight to your inbox - they’re only a click away!
Show me the next benefit...
Get access to loads of free printables and downloads at your fingertips.
Show me the next benefit...NO SPAM
Just pure crafty goodness!
NO SPAM
Just pure crafty goodness!


