Card making Christmas cards Christmas crafts Die cutting How to Papercraft Papercrafter Stamping Techniques Card Making
The Tattered Lace Merry Christmas die is the only one you need in your Christmas stash this season and the perfect starting point for your festive cardmaking projects. Stock up on card and paper in seasonal colours and away you go! All you need is a universal manual die-cutting machine to get you started.

YOU WILL NEED:
Tattered Lace Merry Christmas die
Dies: stitched rectangle, snowflake, stitched hillside
Stamps: snowman, Rudolph
Ink pads: Ranger Distress Oxide blue, pink, purple; black
Cardstock: various colours, gold glitter
Patterned papers
Embellishments: ribbon, gems, sequins
Acetate
Tool, ink blending
Die-cutting machine
Adhesives: 3D foam pads, foam tape, glue
METHOD:

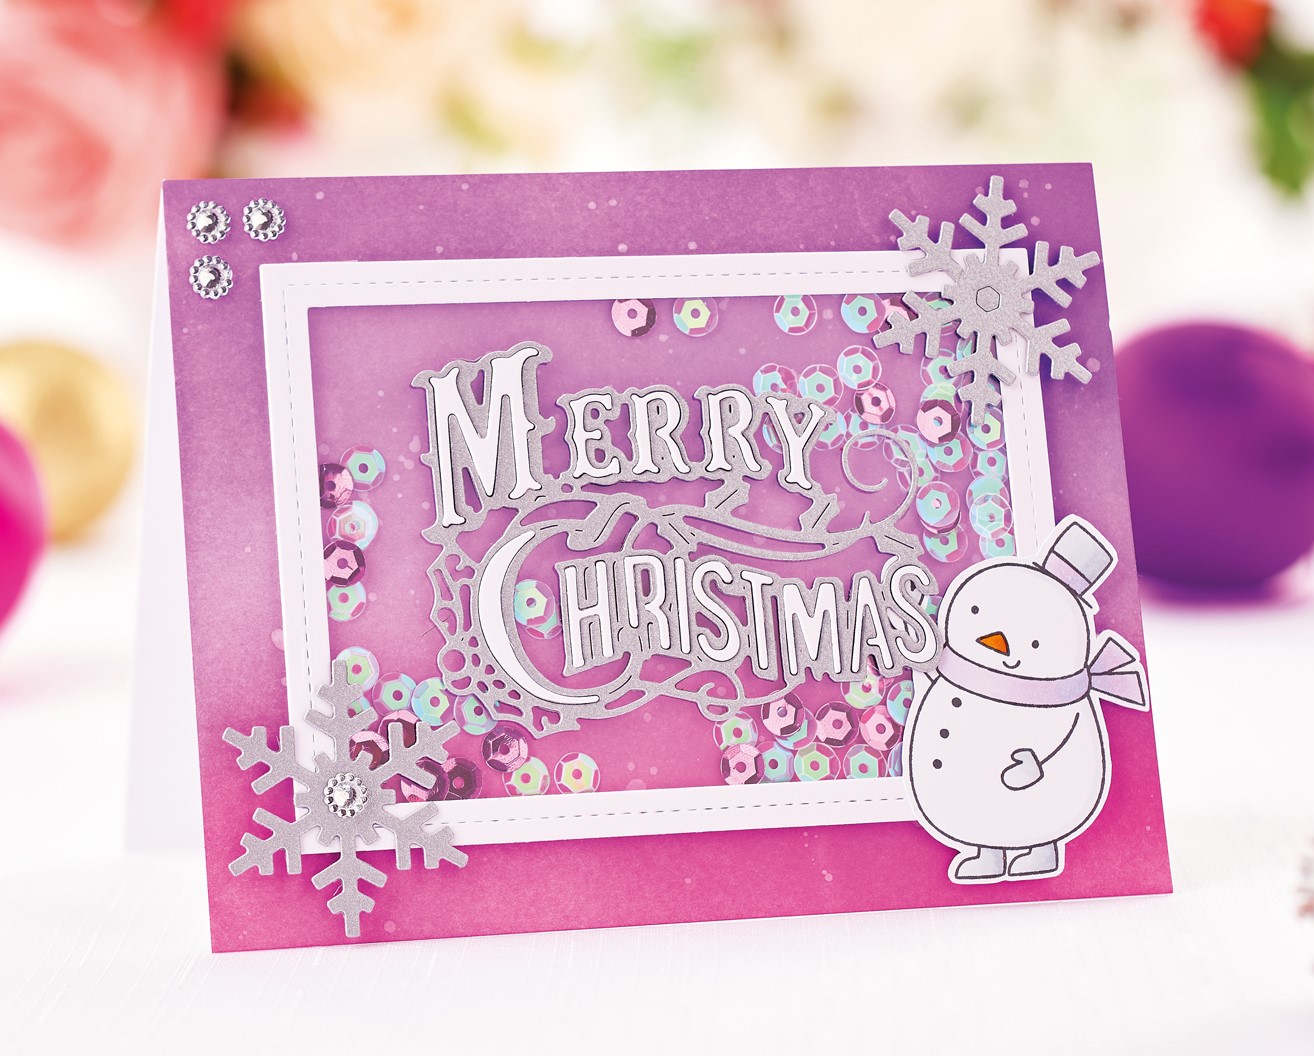
Sentiment shaker
1. Blend purple and pink distress oxide inks onto a rectangular panel of white card, then layer onto a white blank. Spritz with a small amount of water. Die cut a stitched rectangular frame from white card, layer onto acetate and add foam tape around the edges. Sprinkle sequins in the centre of the acetate, then mount onto the card front.
2. Die cut ‘Merry Christmas’ from white and silver card, infill the white die-cut with the silver negative die-cuts and fix to the centre of the shaker element. Stamp a snowman onto white, colour in and trim. Secure to the right-hand side of the greeting. Finish with two die-cut snowflakes and silver gems.

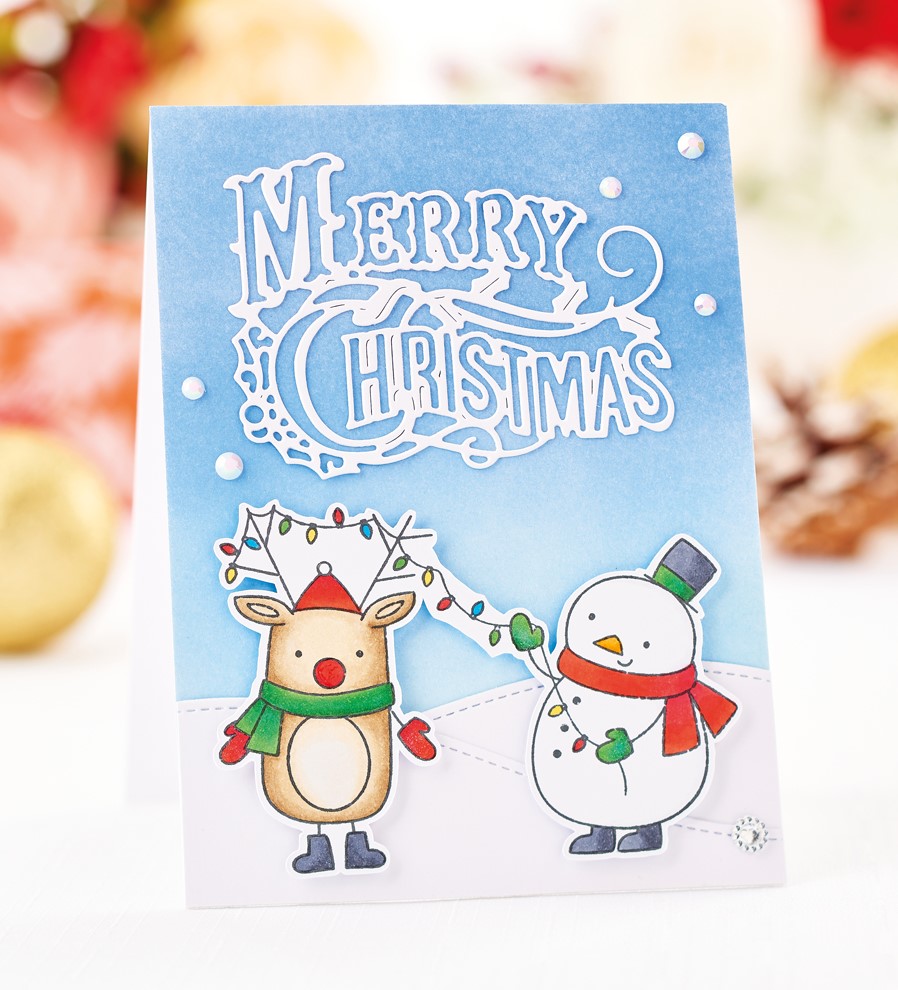
Inked Snowy Card
1. Take a rectangular panel of white card and blend blue distress oxide inks from the top, applying less pressure as you move downwards. Leave to dry. Die cut two stitched hillside shapes from white and layer onto the bottom of the card, trimming to fit.
2. Stamp a reindeer and snowman onto white, colour in and cut out. Secure to the bottom of the card with 3D foam pads. Die cut the ‘Merry Christmas’ die from white card and attach to the top of the card. Layer the panel onto a white blank and embellish with gems to finish.

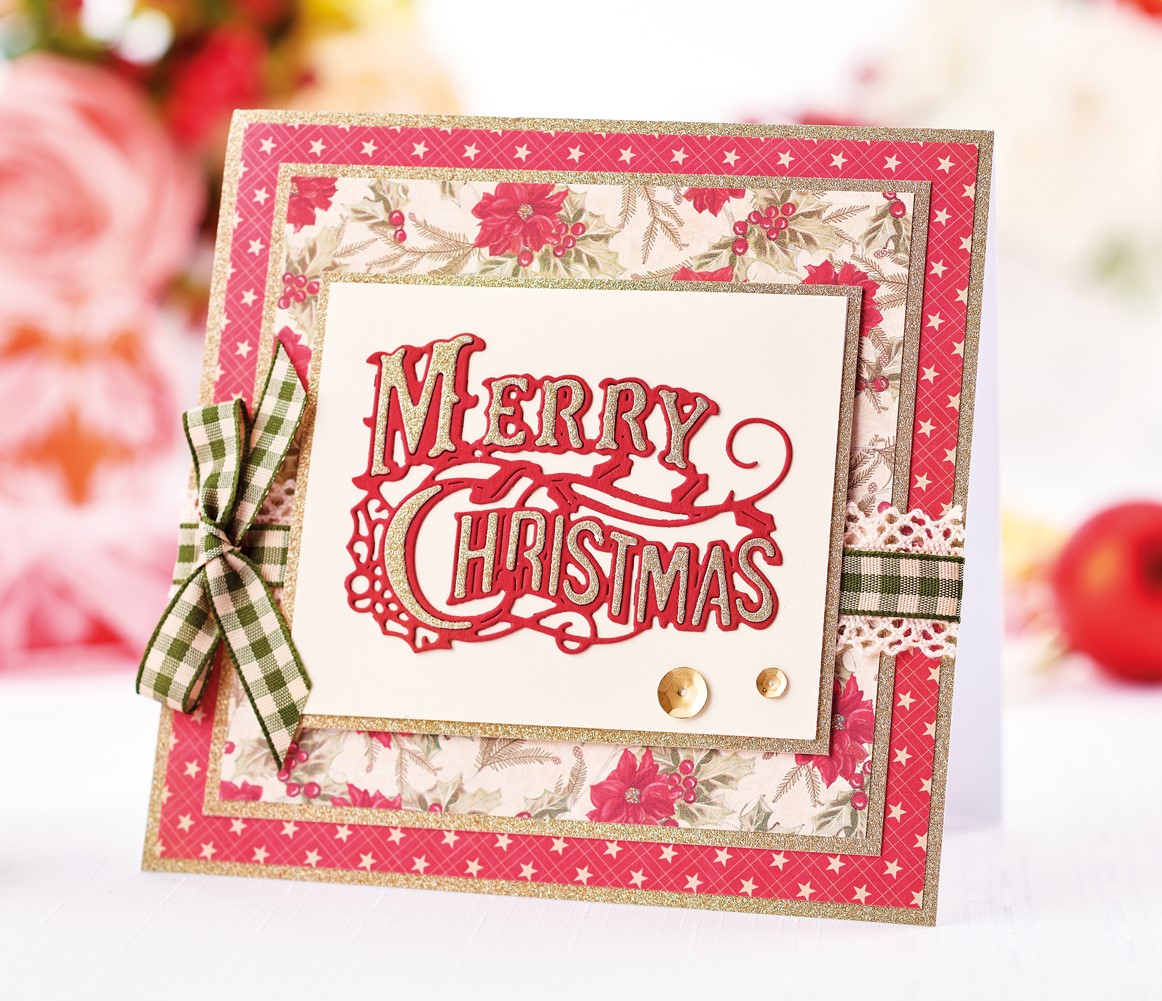
Layered die-cuts
1. Layer a square panel of red star paper onto gold glitter card, then mount onto a white square blank. Mount a slightly smaller panel of poinsettia paper onto gold glitter card, then secure to the greeting. Wrap lace and ribbon around the middle, then tie into a bow.
2. Matt a rectangular panel of cream card onto gold glitter card and fix to the centre of the greeting. Die cut the ‘Merry Christmas’ sentiment from gold glitter and red card. Infill the gold negative die-cuts inside the red sentiment, then glue to the card front. Finish with two gold sequins.

YOU WILL NEED:
Old books
Die, circle
Wooden skewer
Binder clips
Alcohol marker, orange
Adhesives: PVA glue, glue stick
Die-cutting machine

METHOD:
1. Use a circle die to cut lots of discs from book pages. Fold each circle in…
Halloween crafts Home decor Home decorations How to Papercraft Papercrafter Revamping Techniques Projects

Whilst this may look like a paper cutting that took hours to create, it really couldn’t be any easier. Our talented designer Corinne Bradd has created 15 templates for you to…
Die cutting Home decor Home decorations How to Papercraft Papercrafter Projects

You Will Need:
Templates or SVG files
Brother ScanNCut SDX1200 (optional)
Strong card
Cardstock, various colours
Jute yarn
PVA glue
Autumnal Display
1. Draw a 25cm wide circle on strong card, then draw a concentric 17cm wide circle…
Home decor Home decorations Papercraft Papercrafter Techniques

Shadow box cards, otherwise known as tunnel greetings or diorama cards, are designed to transport the recipient to picture-perfect backdrops in an instant. In this case, PaperCrafter designer Francesca Vignoli…
Birthday crafting Card making Die cutting How to Stamping Techniques Card Making
NO SPAM
Just pure crafty goodness!
YOU CAN REGISTER WITH US TODAY OR CHECK OUT THE MEMBER BENEFITS YOU CAN GET YOUR HANDS ON

Not only will you receive our amazing newsletters packed with the latest projects, exclusive giveaways and freebies, you’ll also get your hands on all of this...
View the benefits
All of our offers will be delivered straight to your inbox - they’re only a click away!
Show me the next benefit...
Get access to loads of free printables and downloads at your fingertips.
Show me the next benefit...NO SPAM
Just pure crafty goodness!
NO SPAM
Just pure crafty goodness!


