


Card making Stamping Card Making
Wild Rose Studio’s animal stamps are so cute, we just had to take them out for a spin.
Craft essentials, Wild Rose Studio stamps, Punch: decorative border, scallop-edged circle, Ink pad: black, Distress ink: black, brown, Liquid enamel pen: black
Meet Bella the elephant – she’s a happy soul who loves balloons, plus she makes a great card focal. Here, PaperCrafter designer Louise Collins shows you how to make a lovely easel card using your stamp. There are two more fab creations using Wild Rose Studio designs in issue 86 of PaperCrafter (on sale 28th August - 24th September 2015).
• Cut an 11cm x 30.5cm piece of kraft card and colour the edges with black distress ink. Positioning the rectangle landscape, score at 12cm, 14.5cm and 17cm to create an easel card with a back panel taller than the front.
• Brush water across white cardstock and allow to soak in. Colour up the elephant stamp with brown distress ink and stamp onto the damp paper, holding it down for a minute for the ink to disperse. Leave to dry fully, or speed up the process using a heat gun.
• Stamp the image a second time directly over the position of the last impression using a black ink pad. Stamp or draw film strip borders on the top and bottom edges of the image panel and distress the sides with a pair of scissors.
• Matt onto black card at a slight angle. Adhere this panel onto the front of the easel base. Dot black enamel accents down the sides of the card front and leave to dry.
• Stamp a circular sentiment in black ink onto white card and mount onto kraft card with foam pads. Punch a scallop-edged circle from black and matt the sentiment onto it, adding silver dots around the edge.
• Take the card, flip it over and turn it 180° so the elephant motif is face-down and upside-down. The top panel is the back part of the greeting. Punch a decorative border from black card and stick across the top.
• Add faux stitching by piercing holes along the border and joining with lines of white gel pen. Stick the sentiment on the right using foam pads, ensuring only the top half is stuck down.
• Stamp or draw a decorative border above the black border, going only half way along. Make the card stand up by tucking the front panel under the scalloped circle.
YOU WILL NEED:
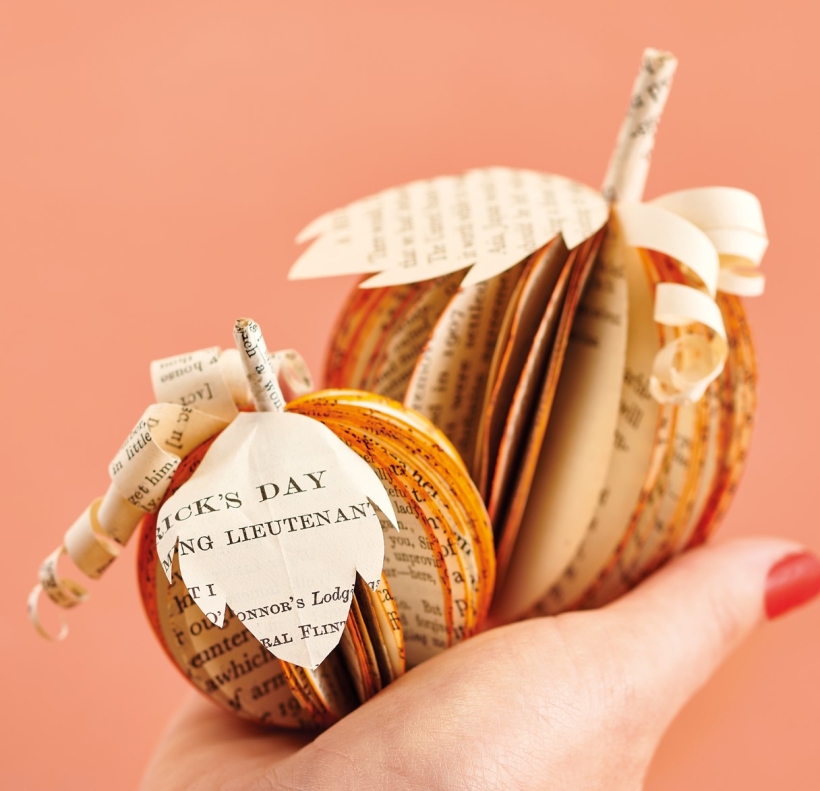
Old books
Die, circle
Wooden skewer
Binder clips
Alcohol marker, orange
Adhesives: PVA glue, glue stick
Die-cutting machine

METHOD:
1. Use a circle die to cut lots of discs from book pages. Fold each circle in…
Halloween crafts Home decor Home decorations How to Papercraft Papercrafter Revamping Techniques Projects

Whilst this may look like a paper cutting that took hours to create, it really couldn’t be any easier. Our talented designer Corinne Bradd has created 15 templates for you to…
Die cutting Home decor Home decorations How to Papercraft Papercrafter Projects

You Will Need:
Templates or SVG files
Brother ScanNCut SDX1200 (optional)
Strong card
Cardstock, various colours
Jute yarn
PVA glue
Autumnal Display
1. Draw a 25cm wide circle on strong card, then draw a concentric 17cm wide circle…
Home decor Home decorations Papercraft Papercrafter Techniques

Shadow box cards, otherwise known as tunnel greetings or diorama cards, are designed to transport the recipient to picture-perfect backdrops in an instant. In this case, PaperCrafter designer Francesca Vignoli…
Birthday crafting Card making Die cutting How to Stamping Techniques Card Making


